Projects
- Machine Tools
- Foundry
- Reference Information
- Electrolytic Rust Removal
- EDM
- Hot Wire Foam Cutter
- Projects
- Piper PA12
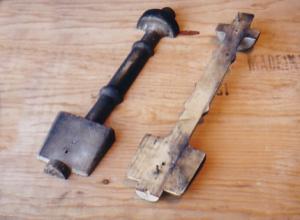
Bench Hand Rammer
This is my first, successful, casting project. It's a hand rammer for ramming the sand when sand casting. It is cast in aluminum, from old pistons, using a pattern borrowed from Bob MacDonald. The first picture is a picture of the pattern, it's a split pattern. This means that when ramming it up, half of it is in the cope and half is in the drag. The extensions on either end allowed the cast piece to be chucked in a lathe to finish the piece. The second picture is the final product, after cleaning it up on the lathe. I think I got the aluminum slightly too hot and the the casting has a few bubbles but I am quite happy with the final result, especially for a first try.

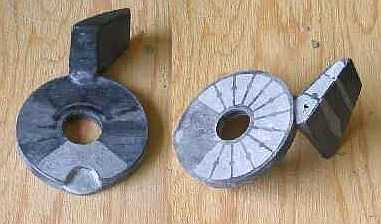
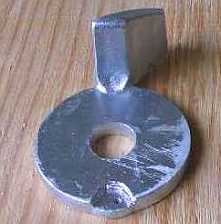
Lawnmower Throttle Lever
This throttle lever had a worn hole where the cable connected to it. Since I was planning on doing some casting of some other parts I decided to make a replacement part. The original was made of plastic and had several ribs on the underside as well as one on the top. I used some epoxy putty I had to fill these areas in because they would make the pattern more difficult to draw from the sand. The first picture shows the top and bottom of the old piece, ready to be used as a pattern. The second picture shows the completed casting after a quick clean up with a file.
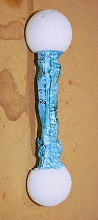
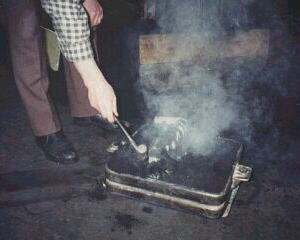
Candlesticks
These candlestick pictures are from some early casting experiments I performed with lost foam casting. In this technique you make a pattern out of foam, I used blue styrofoam insulation, and the pattern is burnt out when you pour the metal. In the first picture below you can see the pattern, the white balls on the ends are just styrofoam balls used as gates. The foam pattern was shaped using a knife and a torch, I wanted an irregular surface on the finished candlestick and this worked well. The pattern is then packed in sand, I used the same green sand I use for my normal sand molds. I packed the sand closest to the pattern by hand to make sure that I got sand packed into all the small crevices of the pattern. Then I rammed the rest of the sand, although I didn't ram as hard as I normally would since I didn't want to damage the pattern. It is important to vent the mold very well as there will be a lot of gas from the burning foam, on the subject of which make sure that you do this in a well ventilated area.
I am still learning at this technique but it seems to have a lot of promise. I seemed to luck out the first time I tried this and the castings turned out very good. In subsequent sessions I have had problems with the casting being very gassy. I was experimenting with different gating and venting, which I plan to continue doing till I see what works best for me. The second picture shows a completed candlestick. The pattern and completed piece here aren't the same as you can tell if you compare the two. I was very impressed with the accuracy of the finished piece, even the smallest protrusions on the pattern that I did not think would allow the aluminum to run into seem to be accurately cast. The top and base are brass pieces that I made on my lathe.
I've done a few small pieces for around the house, unfortunately there are no pictures, and really like this method. If you only want one piece it is very easy to quickly carve a piece out and cast it versus making a traditional pattern. I next want to make a hot wire foam cutter as that should improve the speed at which I can make a pattern and I think it may improve the surface finish.
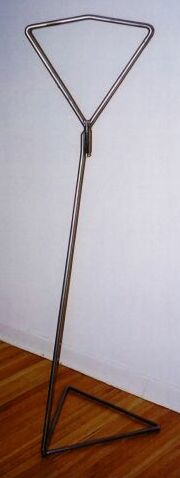
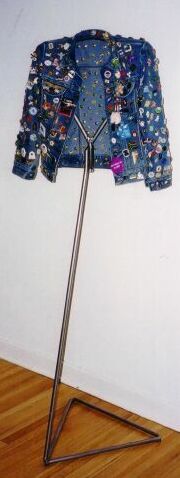
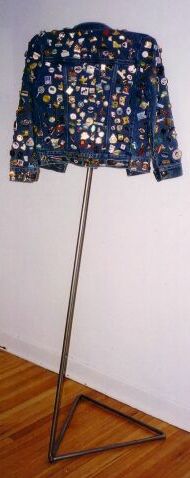
Jacket Stand
I made this jacket stand for a friend. Her son has a jacket which is used to display pins. I made the top triangular portion so that it swivels so it's possible to easily look at either the front or back of the jacket. The stand is made of 5/8" cold roll and has rubber bumpers on the bottom to protect the floor. At last count there were over 300 pins. Thanks to Catherine for taking these pictures.
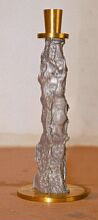
Sundials
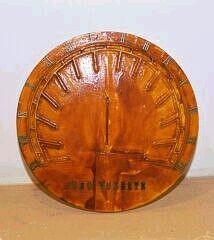
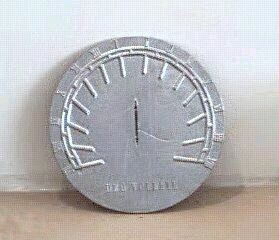
I am interested in sundials, as a matter of fact the thought of casting dials is what originally got me interested in setting up a small foundry furnace. These pictures are of the first dial I cast, obviously I'm still in the learning stage. I elected to use aluminum for my first dials since it is much cheaper to work with, eventually I hope to be casting bronze dials.
The pictures below show the pattern for sandcasting and my first cast sundial minus the gnomon, the slot in the centre is where the gnomon will be installed. For those who look close at the picture you can see that the noon position of the sundial is not in the centre, as it is in most garden store sundials. I wanted to make a sundial that would read Mountain Daylight time, under the assumption that people in Edmonton (where I was living at the time) are unlikely to go out and dig the dial out of the snow in the winter to check the time. To have the dial read MDT you have to design the dial for a specified location. There are several ways of doing this but the method I used was to start with a basic pattern from Fer J. de Vries' program ZW2000. This is a very handy freeware program for Windows that will do all the math for you. I saved the basic dial as a DXF file. Next I loaded it in Autocad to put the finishing touches on it. This included the lettering and moving the lines to make allowances for the width of the gnomon.
I printed out the dial and glued it to a 12" disc of MDF. I then glued small strips of wood to the lines on the printout. In order to have the pattern pull smoothly from the sand the corners of all the lines where they met the disc had to be filleted. To do this I used beeswax. Once all the lines were finished I applied several coats of shellac. After the shellac came the letters and the numerals. This is where I went wrong. The letters and numbers I used were from a hobby shop and designed for use on clocks. While they look good I found that they had too many very tight corners and would not pull well from the sand, at least I couldn't. I have some new numbers and letters that are more open which I will try, time permitting.
For more information on sundials and their construction you can check out the North American Sundial Society.
Roy Leadbeater's Shop
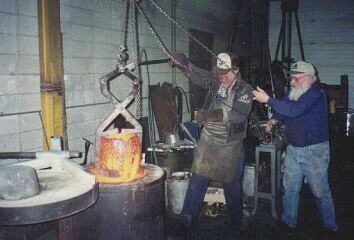
I was asked to help Joe Laboda and Robert Grauman cast some bronze sculptures for artist Roy Leadbeater at Roy's shop. Below you can see Joe Laboda (on the left) and Robert Grauman pulling a crucible of molten bronze from the furnace. The crane was used with a lifting tong and the crucible was placed in a two man pouring shank. While pouring Robert kept the dross from the pouring into the sand molds, Joe controlled the two man shank and I provided the strong back/weak mind end of the shank.
In the first picture below you can see the flasks after the pour was finished, before they were knocked out. You can see the crucible cooling in the background. The flasks were clamped and weighted to prevent the flasks separating when the bronze was poured.
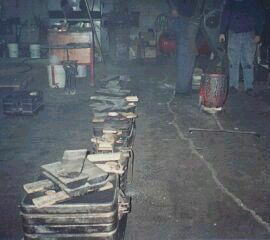
The second picture above is one of the castings I assisted with being removed from the petrobond mold. This particular piece is a candlestick and was done using the lost foam method of casting.
This website and all of its contents (except
where specified)
are Copyright © 2001-2007 by Al Schoepp. All Rights Reserved.