Electrolytic Rust Removal |
||
Work
|
If you're looking for a effective, relatively safe, and (best of all) cheap method for removing rust give electrolytic rust removal a try. I know that it sounds intimidating but it is actually very simple and won't damage the underlying material. This method basically consists of submerging the rusty metal in an electrically conducting solution of washing soda (also known as sodium carbonate). I've been told that baking soda (sodium bicarbonate) also works but I have no personal knowledge of this. The positive lead from an automotive battery charger is connected to a steel electrode and the negative lead is connected to the piece to be cleaned. When the charger is turned on a reaction occurs at the metal/rust interface on the object. this loosens the rust so it may be easily brushed off. This method does not appear to damage the underlying metal in any way, it seems to only remove the rust. Of course it will not improve the finish of the metal under the rust so any pitting on the metal will remain, just the rust will be removed from it. The cleaning solution should last almost indefinitely, only add water to replace that lost by electrolysis and evaporation. Important Safety Precautions
What do you need to start?
 The Procedure The first step in the process is to prepare the cleaning solution. dissolve roughly 1 tablespoon/gallon of washing soda in water. Ensure that all the crystals are dissolved. Roughly clean the steel anode. It doesn't have to be perfect just good enough that you can get good electrical contact. Attach the positive lead (red) from the battery charger to the steel anode. Submerge the anode in the cleaning solution, ensure that the clamp from the battery lead isn't submerged. If it is it will be eaten away with this process. The steel electrode will also be eaten away but very slowly. If you are trying to clean a large piece you will likely need more than one anode as this process almost works "line of sight". In other words the anode and part to be cleaned shouldn't be hidden from each other, for example if you are cleaning a large piece and only have one anode the side facing the anode will clean better than the side facing away from the anode. You can use multiple anodes so that the piece to be cleaned is surrounded, just connect them together with wire. Attach the negative lead from the battery charger to the piece to be cleaned. Submerge this piece, it doesn't matter if this clamp is submerged as it won't be eaten away. Ensure that this piece and the anode don't contact each other as this will cause a short circuit. They should be separated by several inches. Turn on the battery charger. If the current is too high on the battery chargers current meter there are a number of things you can do to reduce it;
In the picture below you can see the plastic drum I use for cleaning large parts. The electrodes around the side are pieces of rebar connected with the black wire on the outside of the drum. If necessary I can have all the electrodes connected or only some of them. The piece that is in there has been connected for a few hours and you can see the rust colored scum now floating on the top of the solution. It's not visibel in this picture but the negative (black) lead from the battery charge is connected to the bar from which the part is hung. 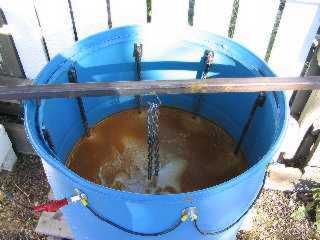 Once it is set up and working you should see small bubbles of hydrogen and oxygen coming of the electrodes. Now you just have to wait. the time required to clean a part will depend on many variables:
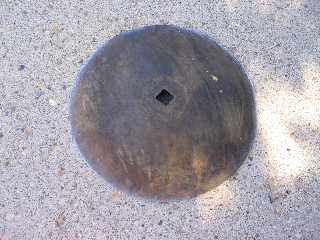
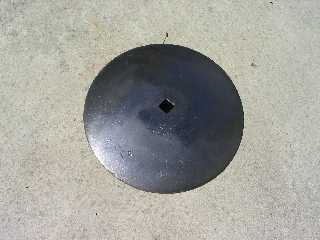
If necessary it is acceptable to leave the operation on overnight so long as it is not in an enclosed space (see the safety precautions above). You may have to move the piece occasionally for better cleaning as the best cleaning is done on the part that is in direct view of the anode (line of sight). If a piece is too large to fit in the bath you will obviously have to rotate it at some point. It may also be necessary to take the part out of the bath and clean it with a wire brush to remove some of the now loose scale which will look like a dark sludge. You can use a plastic scrub brush an water to remove the sludge, if it looks like you took the piece out too soon simply put it back in the cleaning solution. Once the piece is finished it will be a grey color. If it is an antique this may be an acceptable finish, otherwise use a wire brush to remove the grey oxide coating. Now you have to make sure the piece is dry so that it won't start rusting again and put some sort of rust inhibitor, wax, or oil coating. Below are some pics of a test I did. As usual I forgot to take the before picture so the first picture is a different disc blade that was rusted the same as the ones that I had done. The second picture is what the disc looks like after being removed from the cleaning solution. The black stuff on it is quite loose and came off easily with a wire brush. The final picture is of the completed disc blade after wire brushing. 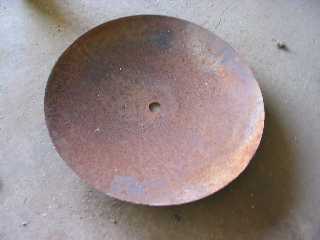
NOTES
|
|
|
|