Foundry Test |
||
Work
|
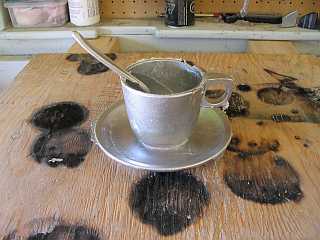
I was told that one of the tests for the apprentice foundryman was to be able to cast a cup and saucer with a spoon in the cup using green sand. While I have no need to do this I thought I would give it a try. I found that aside from the problems of deciding how to ram the pattern so that it can be removed it is also very important to have the sand tempered correctly. The first attempt my sand was too dry and had very little green strength. After ramming it up I had a difficult time removing the pattern pieces without damaging the mold. After pouring it was obvious that some of the mold ha shifted and cracked so it wasn't a good casting (see the first two pictures below). The next casting was very annoying. The sand was correctly tempered and it rammed well. The pattern pulled nicely and I felt the pour went well. On shakeout, however, it turns out the aluminum was slightly too cool and it froze in the mold before the whole spoon filled. You can see the results below. The next casting the sand was a little too wet. While the whole pattern filled nicely the cup and saucer weren't joined. You can see the results below. I believe this was caused from too much steam in the mold due to the overwet sand. I think this casting would have been easier to do using an oil base sand , such as Petrobond. However I have stuck with the green sand since I find it much cleaner to work with. Below you can see the first steps in the process. First the saucer is placed upside down on a board and the cope (top flask piece) is placed around it. It is sprinkled with parting powder, sand is riddled over top of it and then rammed hard. The cope is flipped over and parting dust sprinkled over the surface. I then marked where the pouring sprue and runners will go, placed the cup in the saucer and set the cheek flask (the middle flask) on the cope. 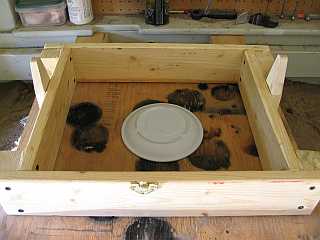
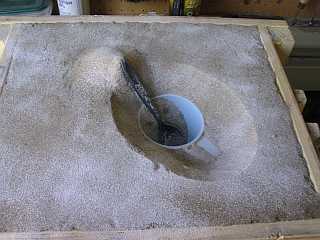
Next I riddled sand and rammed it hard while holding the cup in place on the saucer. My cheek flask was a little taller than the cup so I then cut down to the rim of the cup and removed all the sand from the inside. I also cut down around the handle so I could ram up some separate pieces of sand that would allow the cup to be pulled from the sand. After liberally sprinkling parting dust in the area dug out around the handle I used my finger to plug the hole in the handle while ramming up the sand in the other side. You have to be careful not to damage the sand forming the walls of the cavity. Once one side was done simply repeat for the other side, except you don't have to use your finger to block the handle hole. Once that was done I dusted the inside of the cup with parting dust and rammed up the piece of sand that would fit under the spoon and built up the area that would go under the handle of the spoon. I also carved little notches in the sand either side of the spoon handle inside the cup to help that piece stay in place once the patterns are removed, I found without those that it tended to slip sideways. Next set the drag on the cheek flask, sprinkle with parting dust and ram it up. 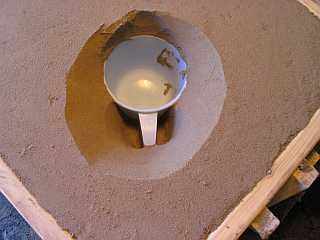
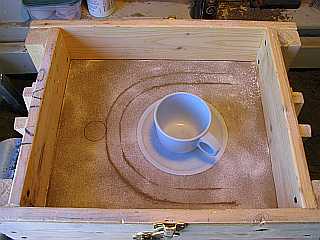
Now you get to see how well you did. Rap the sides of the flasks to loosen the pattern pieces and remove the drag by lifting straight up. Set the drag flask down and you should be left with something resembling the first picture below. Remove the spoon from the cup. 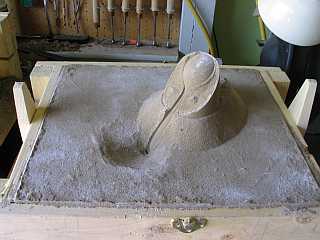
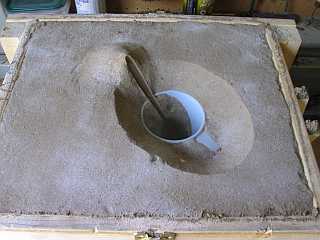
I removed the cup by rapping it to loosen it and lifting straight up. The little pieces of sand around the handles will come out with it, make sure they don't fall and get damaged. I removed the piece of sand in the cup by simply turning it over. Place these three pieces in the appropriate locations on the drag as pictured below. I cut the runners in the sand of the cheek flask. In the second picture below you can see what also looks like a gate from the runner to the mold cavity. I started to cut that but then realized I should be putting the gates in the cope so ti doesn't actually go all the way to the mold cavity. Next place the cheek on the drag VERY CAREFULLY. If you're not very careful you may bump some of the loose sand pieces sitting on the drag and knock them out of position. You should see something similar to the second picture below at this point. 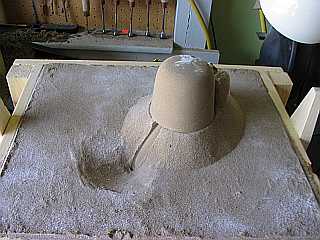
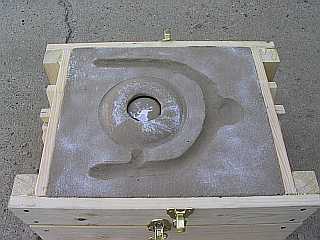
I next cut the pouring sprue and gates to take the metal from the runners to the mold cavity. Below is the cope just prior to setting it on the cheek and closing the flask in preparation for the pour. The second picture shows the results. I haven't cleaned the casting at all, just cut it off of the gates. 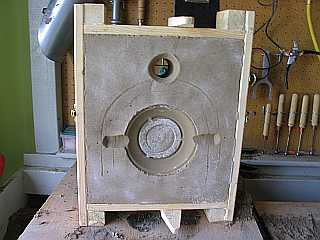
 |
|
|
|