Molding Bench
- Machine Tools
- Foundry
- Furnace
- Molding Bench
- Sand
- Sand Fluffer
- Accessories
- Gating
- Problems
- Foundry Test
- Reference Information
- Electrolytic Rust Removal
- EDM
- Hot Wire Foam Cutter
- Projects
- Piper PA12
The molding bench is where most of the work is done in making a sand mold. Below you can see my molding bench. It basically follows Stewart Marshall's design with a few small changes. Several friends have built these benches as well so I made use of their experience and made a few changes they recommended.
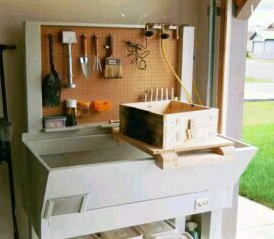
The main change that everyone suggested was that I make the bench higher so that it wouldn't be necessary to bend over all the time while working. My bench is currently a little too high as I built it extra high thinking it would be easier to cut the legs off to get the right height than having to add more if I found it too low. It is currently too high for comfortable ramming of the sand molds but it is at a very good height for working with the sand. I plan on making a small platform that I can stand on when I'm ramming a pattern, maybe 3" high, that I can slide under the bench when I mix/recondition the sand. Hopefully that will give me the best of both worlds.
I used pegboard to mount some of the accessories so that they are convenient. In the bottom left corner of the bench you can see a small aluminum slide door. This makes it easy to move the sand from the bench back to the buckets for storage. I put it on the front rather than the side as I have limited room in my shop so I have easier access to the front of the bench. Because of the limited room I have I made my bench 4' wide, if you have more room a 6' or even an 8' bench would be nice to have.
I added a switched electrical outlet to the lower right corner of the bench. I find this very convenient for my sand fluffer. It's easy to get to when I'm using the fluffer and the fluffer cord doesn't get in my way when I'm using it. To provide the power to the outlet I just have a cord that I plug into a convenient outlet. I also installed a compressed air manifold in the upper right corner of the bench. I plan on using this for a blow gun, small spray gun and an air rammer
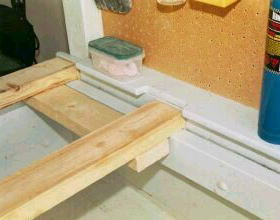
The first picture above shows the back support rail in my molding bench.
I spaced this 1/2" from the back wall of the bench, making sure to
leave it open so that it doesn't collect sand. You can also see that the
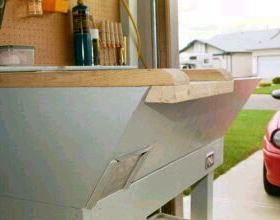
shelf on the back of the bench has a lip that extends 3/4" past the
back of the bench. I did this as part of the changes I made to allow the
molding rails to be secured to the bench so they can't lift or shift forward
when I'm ramming or rolling the flasks. Rather than try to explain with
words you can see from the pictures above how this works. Once the molding
rails are slid to the right they are secure and can't be removed.
This website and all of its contents (except
where specified)
are Copyright © 2001-2004 by Al Schoepp. All Rights Reserved.